Sliding Gate Automation
Installing a sliding gate across our driveway, Automating with remotes for the vehicles a wireless numeric key pad for external access and exit button on the inside. Finally hooking up to the Raspberry pi relays and enabling opening via a web page displaying a live feed from the IP camera pointing at the driveway.
Measuring and Ordering the Gate
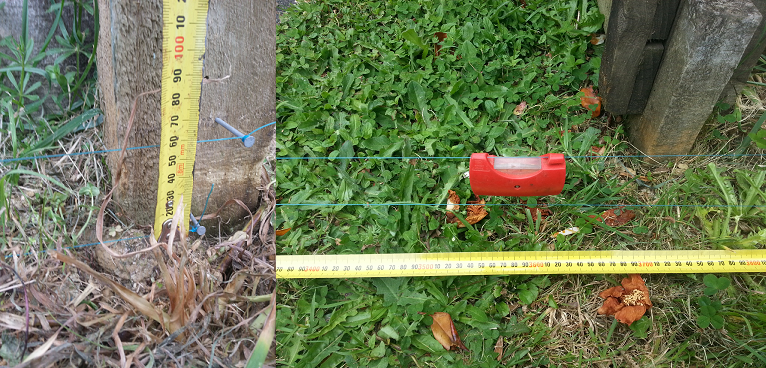
Measuring my driveway it appeared to have a slight fall from left to right, If i wanted the gate to be level when closed i would have to allow for the fall when having the gate built. To find out exactly what the fall was i setup a string line level across the driveway and measured the difference on the lower side. I also needed to make sure i had enough room down the fence line to allow for the gate to fully open.
With the measurements out of the way I drew up my gate plan.
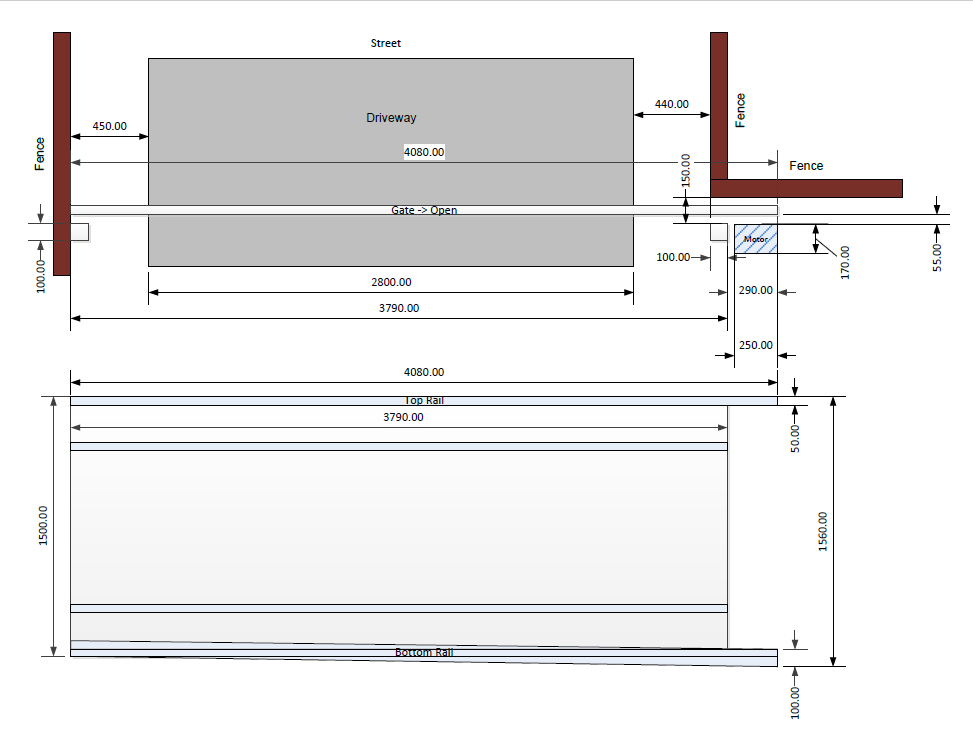
Easygate the company I had chosen to build the gate for me can do sloaping bottom rails which was perfect for my needs. Without allowing for the fall you would end up with funny lines or worse putting your posts in on angles rather then perfectly plumb.
Foundation for the sliding gate.
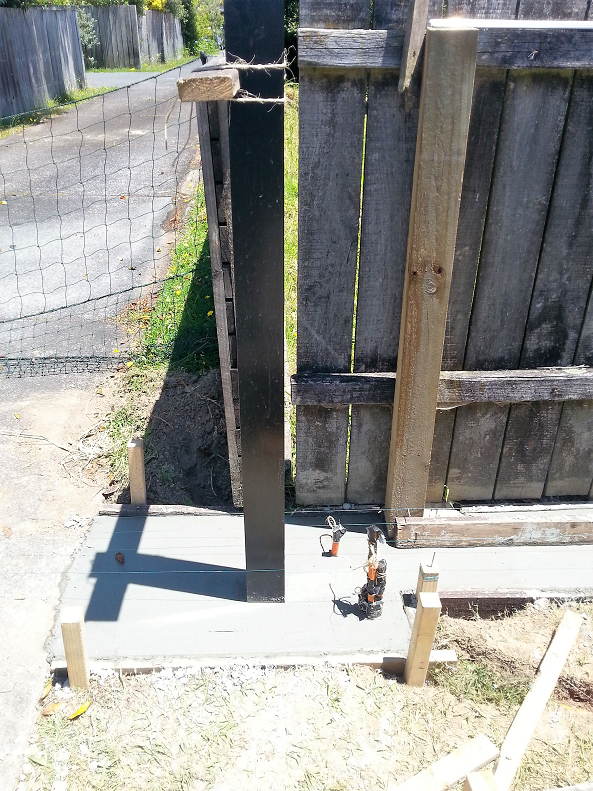
The foundation for the gate was dug out maintaining the same fall as the driveway, this is important for smooth operation when automating. For the cables a inserted conduits into the concrete allowing all cables to run hidden inside the posts for the IR beams and allowed for running 2 x cat 5 cables in the U track the gate sits on to the other side. The IR beam on the receiving post also had a conduit under the track feeding into the post so it was protected and hidden from view. This allowed me to get cables to the far side of the driveway without having to cut the existing driveway.
Installing the Automation
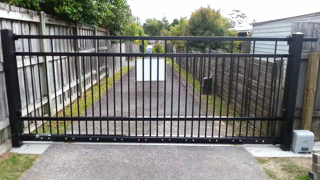
After the concrete has set i ran all the necessary cables through the conduits using the draw strings i had prepared. Installed the gate, mounted the motor following the notes and instructions provided by EASYGATE. All in all it was very straight forward and painless and probably took the least amount of time out of the whole project. Hooked up the IR beams and straight away I could tell the were alighed correctly as i could hear the relay activate when i broke the beam with my hand(I had allowed for the 60mm difference on lower post). A wireless keypad was installed outside the gate for friends and relatives to use that didn't have a remote or if you went out for a walk and left your keys at home.
Below is a link to a video of the gate in operation.
Internet enabling the Gate
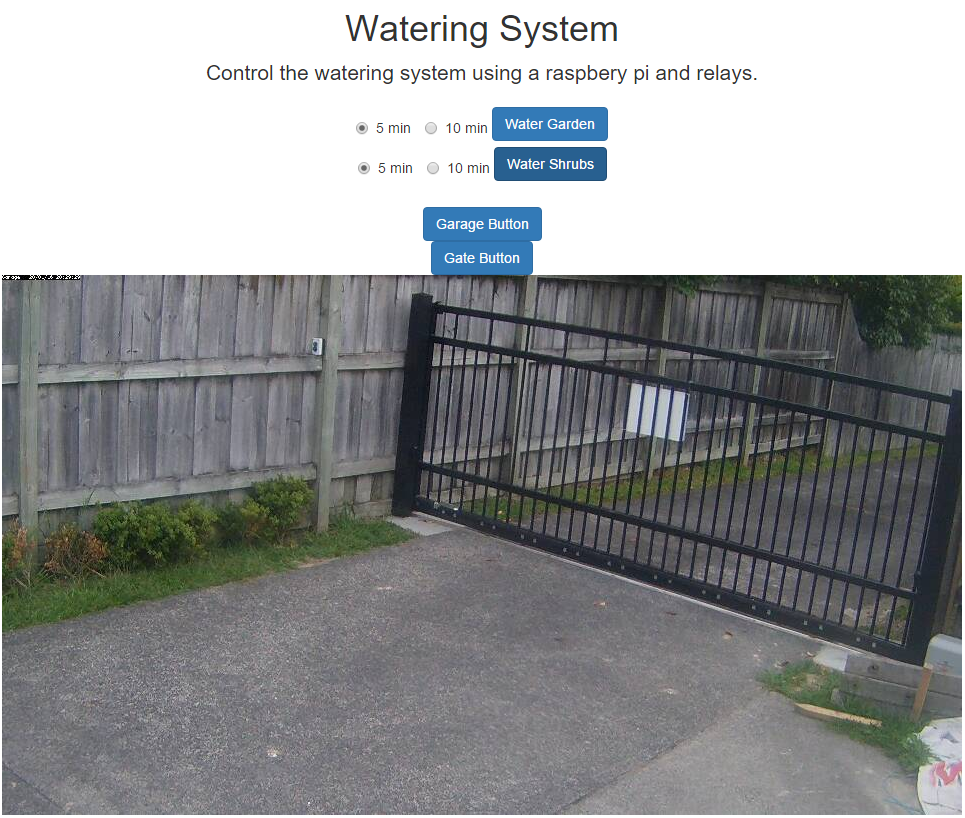
As I already had a Raspberry Pi installed in the garage watering my garden and opening my Garage Door via a bank of 8 relays I had plenty spare.
http://www.geektech.co.nz/raspberry-pi-irrigation
Hooking up the manual gate button to one of the spare relays was easy enough, then updated my web page to include a button for opening the Gate. I had already included a live feed from the IP camera that was connected to Zoneminder which allowed viewing who was their before opening the gate for them.
See Zoneminder Hashed Logins for how to implement the live feed. http://www.geektech.co.nz/zoneminder-hashed-logins
The web page I had created using bootstrap so it was responsive and worked well on both desktop and mobile browsers. As it has access to my garage it is password protected.
That's it very satisfied with end result.